

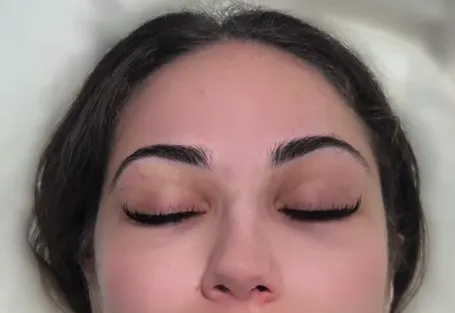
You may wonder how you can do a lashlift at home if you want to have beautifully curled and lifted lashes, without having to use mascara or eyelash curlers. The Lash Lift is a popular beauty procedure that gives your natural lashes a voluminous look by curling and lifting them semi-permanently. This procedure is usually done by professionals. However, by following the correct steps you can get salon-quality results at home. This is a complete guide to how to perform a lash lifting at home.
Book Now!
Call us at (727)-460-4550
What is a Lash Lifting?
A lashlift is a cosmetic procedure that enhances the appearance of natural lashes. It does this by curling the lashes upwards from the base. A lash lift is a cosmetic treatment that works on your natural lashes. It can last several weeks. This process uses a chemical solution that breaks down the natural structure of hair and reshapes it to a curvy shape.
Why choose a DIY lash lift?
You can save both money and time by learning to lift your lashes at home. These are some of its benefits:
- Cost Effective: Professional Lash Lifts can be costly. You can achieve the same results by doing it yourself at a fractional cost.
- Convenience A lash lift can be performed at your convenience, without making an appointment.
- Customization You can customize the curl and lift you want.
What you need for a Lash lift at Home
Gather the tools and products you’ll need before starting. You’ll need the following:
- Lash Lift kit: Make sure it contains perming lotion and setting lotion as well as nourishing oil and lash glue.
- Silicone Rods and Shields: These rods are used to form your lashes. There are different sizes available, depending on how much curl you desire.
- Applicator tools: Small brushes and applicator sticks to apply the solutions.
- Q-Tips and Cotton Pads: To clean and apply the solution precisely.
- Plastic wrap: To secure the silicone pads when lifting.
- Timer Tracks the exact time taken to apply each solution.
- Cleanser : To remove oil, makeup and residue before you start.
Step-by step guide on how to do a lash lift at home
You can achieve beautiful, lifted lashes at home by following these simple steps:
Step 1: Prepare
- Use a gentle cleanser to remove all oils and makeup from your eyelashes. Before you begin, your lashes must be clean and completely dry.
- The size of the silicone shields or rods should be chosen based on how much curl you want.
Step 2: Applying Silicone Rods and Shields
- Place the silicone shield or rod along the upper lashline. Apply a tiny amount of lash adhesive to the silicone rod.
- After a few moments, the glue will become tacky. Press it into place firmly.
- Secure your lashes with lash adhesive by carefully combing them upwards onto the shield or rod. Make sure each lash has been separated and is aligned.
Step 3: Applying Perming Solutions
- Apply the perming liquid to the middle of your eyelashes using a small applicator.
- Applying too close to the root or tip can cause irritation or damage.
- The kit will tell you how long to leave the solution in place.
Remove Perming Solution
- Remove the perming agent gently after the specified time using a Q-tip or cotton pad. Take care not to alter the shape of your lashes.
Step 5: Applying Setting Solutions
- Use a clean, dry applicator to apply the setting solution.
- Leave the solution on your lashes for the recommended amount of time.
Step 6: Cleaning and Nourishing
- With a Q-tip or cotton pad, gently remove the setting solution.
- Use nourishing oil on your lashes to rehydrate them and condition.
- Remove the silicone shields or rods with care and gently clean your eyelashes.
Book Now!
Call us at (727)-460-4550
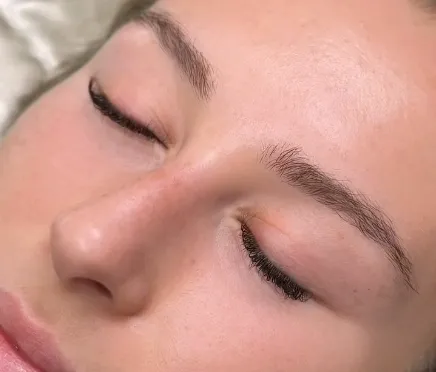
Aftercare tips for long-lasting results
Aftercare is also important to know . To maintain your lashlift, follow these tips:
- Avoid Steam and Water: Do not expose your eyelashes to steam or water for the first 24 hrs.
- Avoid oil-based products: Oils may break down the chemicals in lash lifters and reduce their effectiveness.
- Comb Your Lashes Everyday: Use an old spoolie brush to maintain your lashes.
- Lash Serum is a great way to keep your lashes healthy and lifted.
How long does a DIY lash lift last?
The success of a successful at-home lash lifting can last between 4 and 6 weeks. The length of time your lashes will last depends on how well you adhere to the aftercare instructions and what cycle they grow in.
Possible risks and precautions
Although learning to lift your lashes at home is fun and effective, you should be aware of some risks:
- Allergic reactions: Perform a patch-test before applying any chemical solution.
- Eye irritation: Do not get the solution in your eyes.
- Overprocessing – If you leave the solution on for too long, it can damage your eyelashes.
Last Thoughts about How to Lift Your Lash at Home
How to lift lashes at home is a powerful skill that can help you achieve beautiful, lifted lashes with fewer salon visits. You can achieve beautifully curled lashes for several weeks with the right tools, a proper technique and consistent aftercare. For best results, follow the instructions and prioritise lash health.
